DIY Color E-Ink Picture Frame
Published on • Last updated on
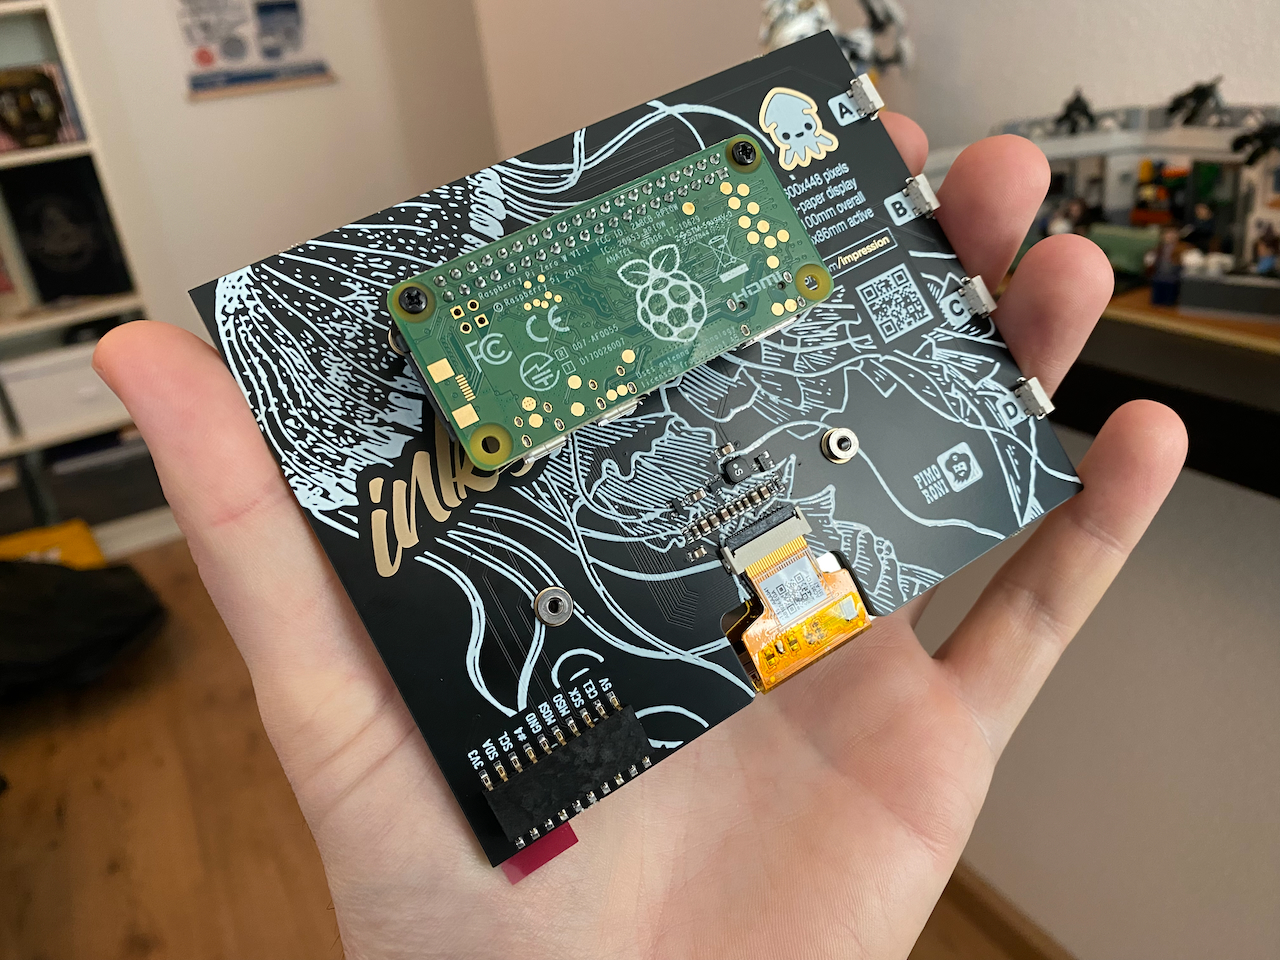
Recently I came across the Inky Impression color e-ink display. The display I picked is 5.7" inch in size (with a resolution of 600x448 pixels), can display 7 colors, is power efficient and does not emit any light. All these factors (might) make it the perfect candidate for a picture frame, so I ordered one.
E-ink, also known as "electronic ink" or "electronic paper," is a type of display technology known for its low power consumption and visual similarity to ink on paper.
Build the picture frame
This specific display is created to fit a Raspberry Pi on the back. I first tried it out with an older Raspberry Pi 2 which I found too bulky, so I replaced it with a much smaller Raspberry Pi Zero W. The installation is as easy as it gets, just plug the Raspberry Pi into the back of the display.
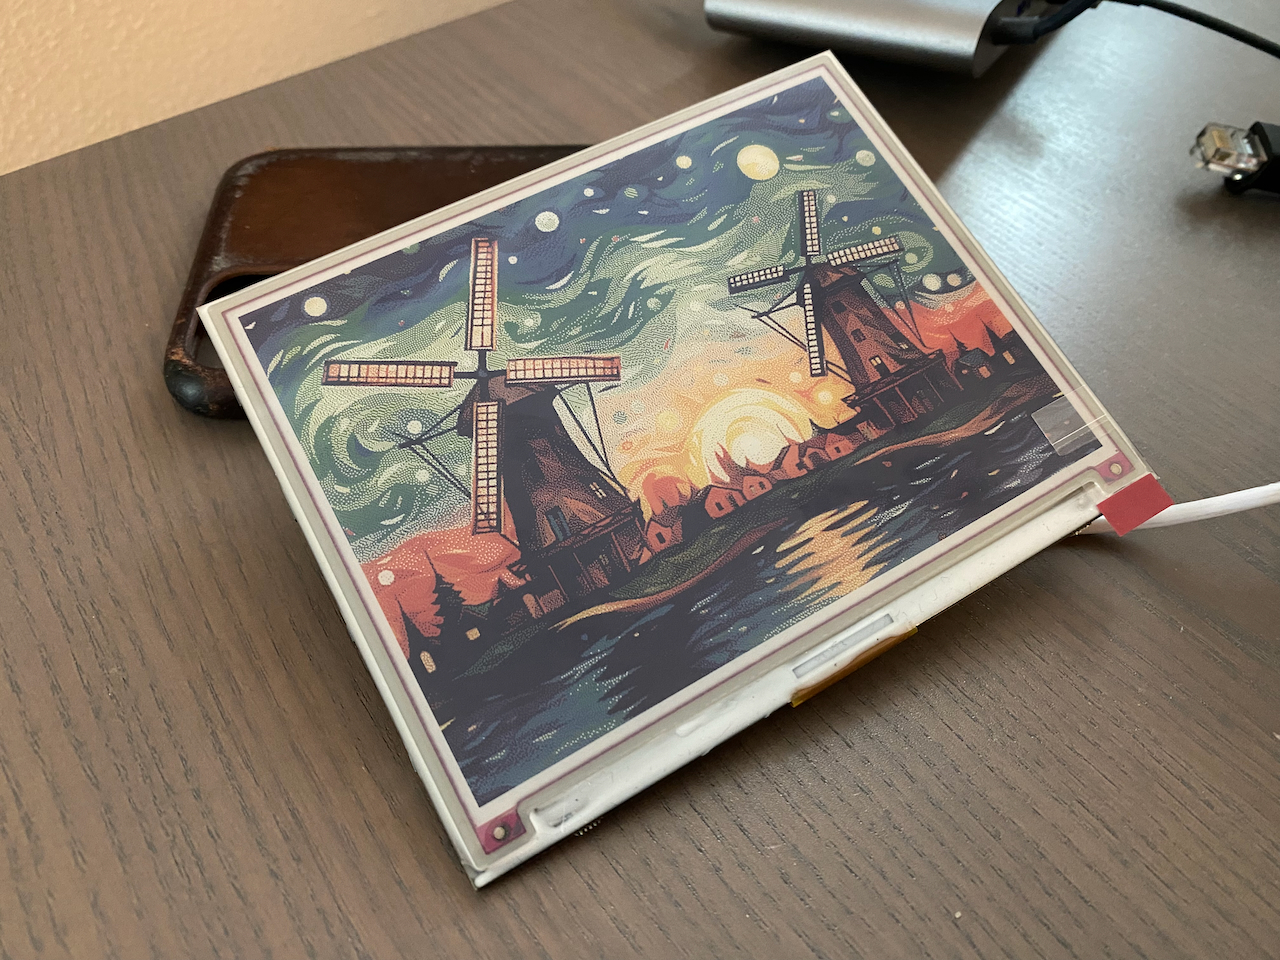
The next step was to find a picture frame that could house this display. I went to IKEA and had a look at the different picture frames they have on sale. I found the RIBBA 10x15cm frame to be the best candidate. The cut-out is almost the same size as the e-ink display (parts of the top and bottom of the display are cut off though), it looks very slick in my opinion as it is the exact format as most regular photos, and it only costs 1,99 euros.
The installation of the e-ink display in the RIBBA frame was quite easy. I cut away most of the RIBBA backplate and re-used the stand. After using some tape the e-ink display was secured in the frame.

Display pictures
The first step to display pictures is to install the Raspberry Pi operating system.
Next make sure to enable I2C and SPI using sudo raspi-config for the Raspberry Pi to interact with the e-ink display.
I would recommend having a look at the Pimoroni GitHub page as it includes some nice examples to play around with.
Make sure to install Python and the Pimoroni Inky dependencies using the following commands. I updated the included pillow package, as it supports some of the features I use in my Python script.
apt install python3 python3-pip libopenjp2-7
pip3 install inky[rpi,example-depends]
pip3 install pillow==10.1.0
Next I created a very basic Python script that does the following:
- Read all PNG files from a pictures directory (you can change this to JPEG)
- Shuffle the pictures
- Resize the picture to fit the e-ink display
- Show the picture on the e-ink display for a random amount of time (between 30 minutes and 60 minutes)
- Repeat the process
#!/usr/bin/env python3

import glob
import time
import random
import os
from PIL import Image, ImageOps
from inky.auto import auto

inky = auto()

MIN_SLEEP = 1800
MAX_SLEEP = 3600
SATURATION = 0.5

PHOTO_PATH = dir_path = os.path.dirname(os.path.realpath(__file__)) + '/pictures'
BORDER_COLOR = inky.WHITE
RESAMPLING = Image.BICUBIC

while True:
  print('Reloading list of images')
  photos = glob.glob(PHOTO_PATH + '/*.png')
  random.shuffle(photos)
  for photo in photos:
    print('Display {}'.format(photo))
    image = Image.open(photo)
    resizedimage = ImageOps.pad(image, inky.resolution, RESAMPLING, BORDER_COLOR)
    inky.set_image(resizedimage, saturation=SATURATION)
    inky.set_border(BORDER_COLOR)
    inky.show()
    time.sleep(random.randint(MIN_SLEEP, MAX_SLEEP)) # keep image on screen between MIN_SLEEP and MAX_SLEEP seconds before changing (random per image)
  time.sleep(5) # sleep to not overload the PI when e.g. no images are found
To make sure this script automatically starts when the Raspberry Pi is booted, I added the following line to the crontab (using crontab -e). Make sure to change the path to where the Python script is located.
@reboot python3 /home/username/eink/photo.py &
Photos to display
Personally I do not show any real photos on the display, but rather images I created using AI tools like Midjourney, screenshots I created while playing PlayStation games and art from the Rijksmuseum website. This is a set of images I use that look exceptionally well on the e-ink display.

Conclusion
The picture frame has been on my desk for some months and I'm very happy with it! Would I create this project again knowing what I know now? Absolutely!
The good
- It looks cool and was fun to build
- The display does not emit light making it feel like a real photo in a frame
- The e-ink display makes the image look really crisp and sharp
- It is fun to constantly see different images in the frame on my desk
Potentional downsides
- The e-ink display can only display 7 colors, making it more suitable for certain types of images (like drawings and/or cartoon style images)
- Changing an image is slow, it takes around 15 seconds during which the display flickers
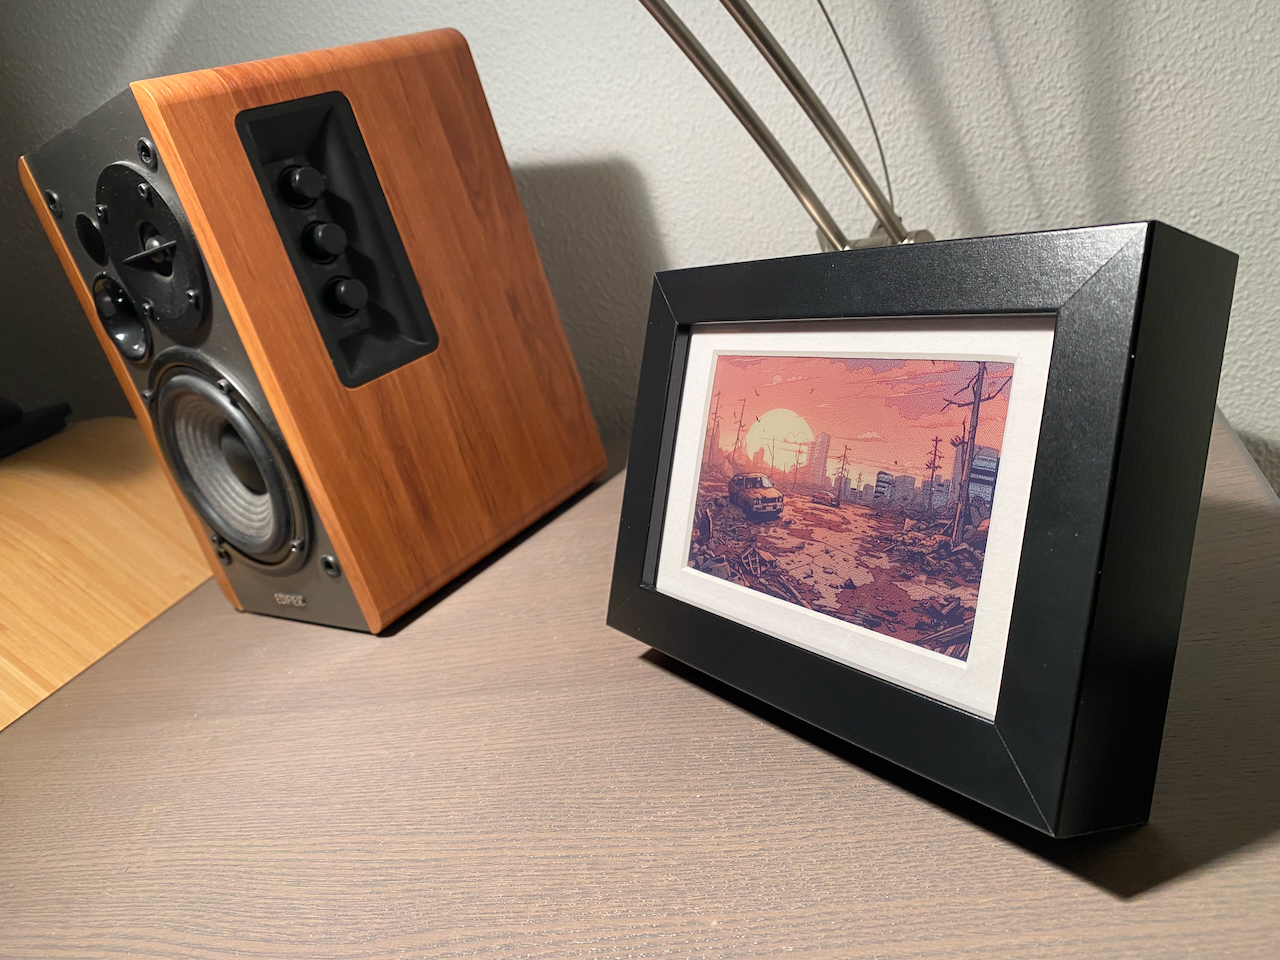
End result
I let the end result speak for itself.