
Receive a notification when the washing machine completes its cycle
Published on • Last updated on
It's quite frustrating when you forget to take out your wet clothes from the washing machine after it completes it's cycle. Some modern "smart" washing machines have to ability to send out a notification when it's done, but mine does not.
As I am using Home Assistant it should be pretty straight forward to create such a solution myself.
Getting started
In my appartment the washing machine and dryer are located in the bathroom. Because of this, both appliances are connected to a pull switch instead of directly to a wall socket. The result is that I am not able to just add some smart plugs between the wall socket and the appliances.
Luckely brands like Shelly offer tiny energy meters like the Shelly PM Mini Gen3 that can be installed in small spaces like this pull switch. Another huge benefit is this device is cheap (around 15 euro's) and maybe most important, it does not require any "internet or cloud connection" to function!
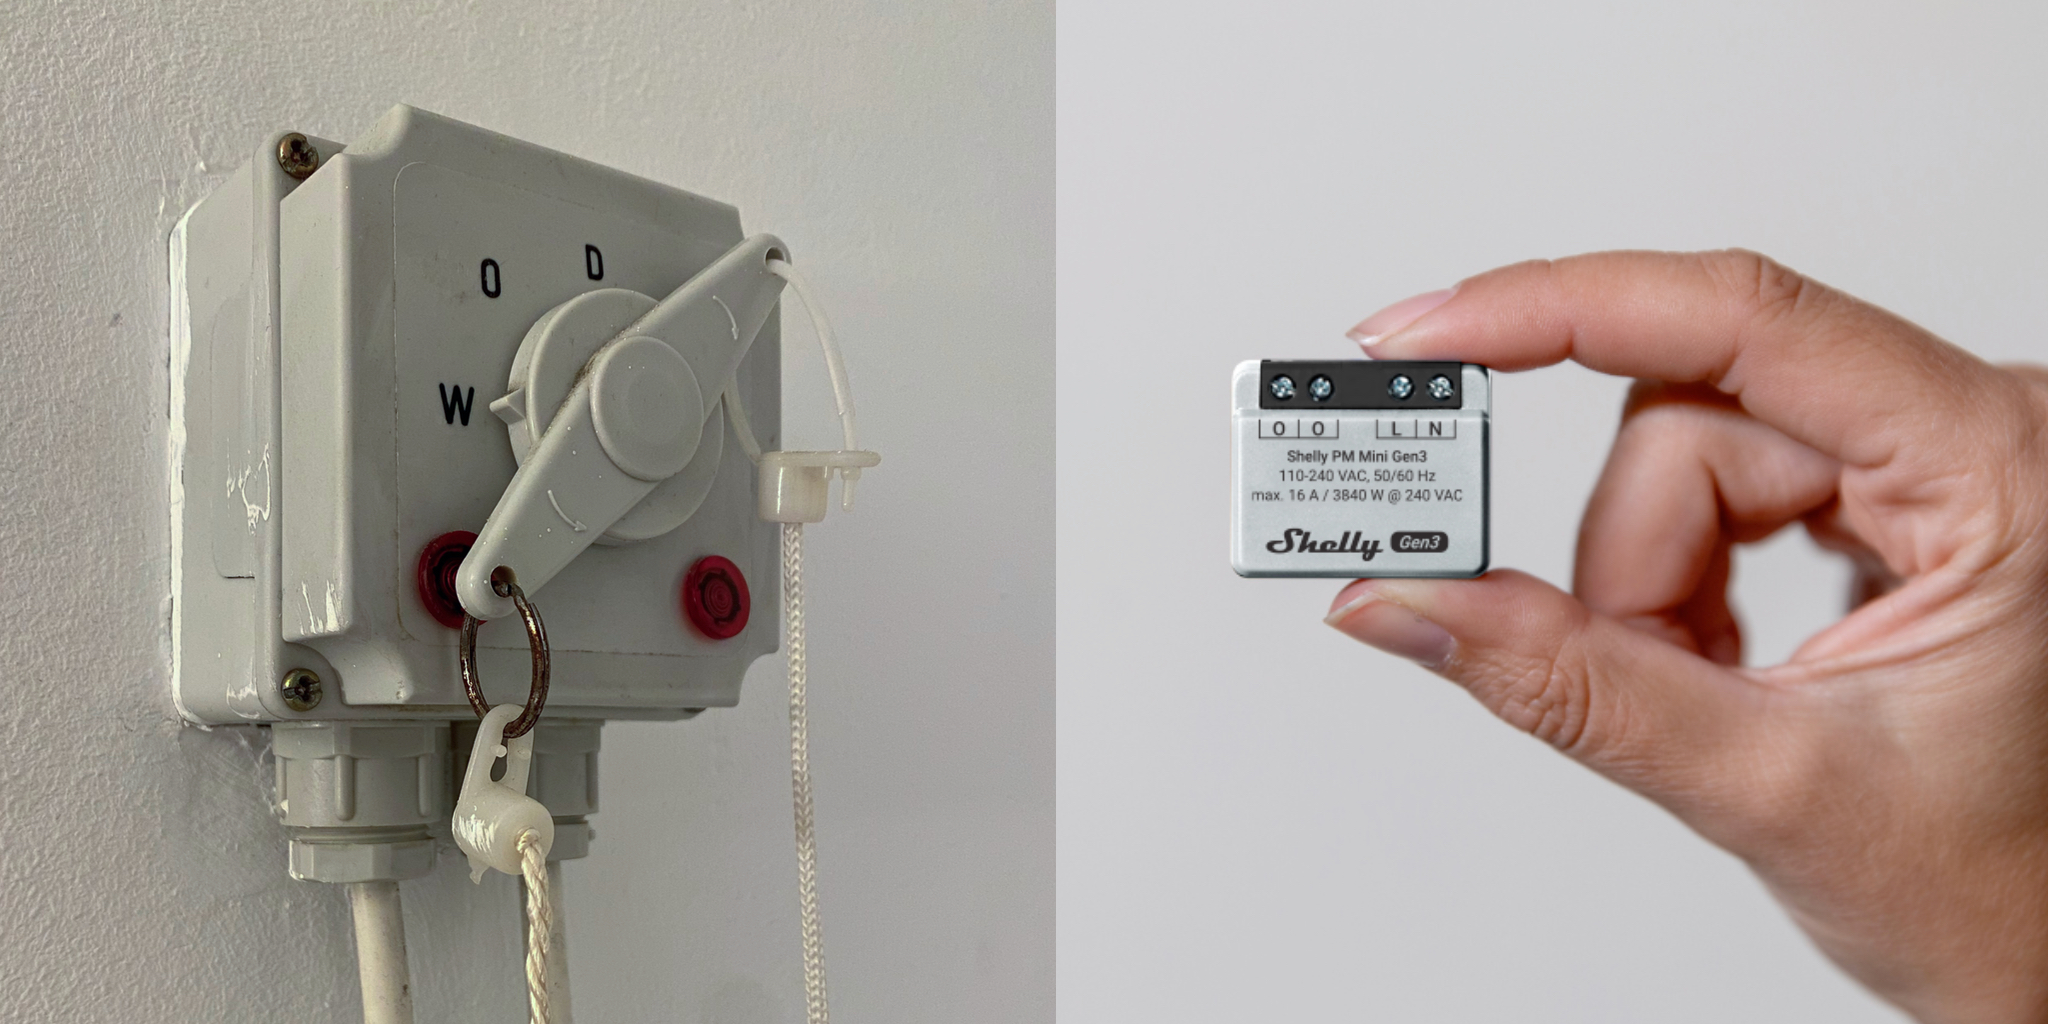
Before you purchase such a device you have to make sure it can handle the power usage of the connected appliance(s). This specific Shelly model handles a maximum of 16A / 3840 watts, which should be sufficient. Also make sure your (pull) switch has enough empty space to accomodate the energy meter.
Before you start, you will also need some additional wiring and a clamp (lasklem in Dutch) to connect multiple wires together.
Installing the Shelly PM Mini Gen 3
The most important step before installing the energy meter is to turn off the electricity. And if you do not known what you are doing ask someone else to help.
I opted to use a single Shelly energy meter to monitor both my washing machine and dryer. The result is that I am not able to distinguish which appliance is in use. For my set-up this doesn't matter as I find it relevant to receive a notification when either of the appliances completes its cycle.
After opening the switch you should see three wires come out of the wall into the switch: ground (green), null / neutral (blue) and phase / live (brown) (this might be different where you live, always check local regulations).
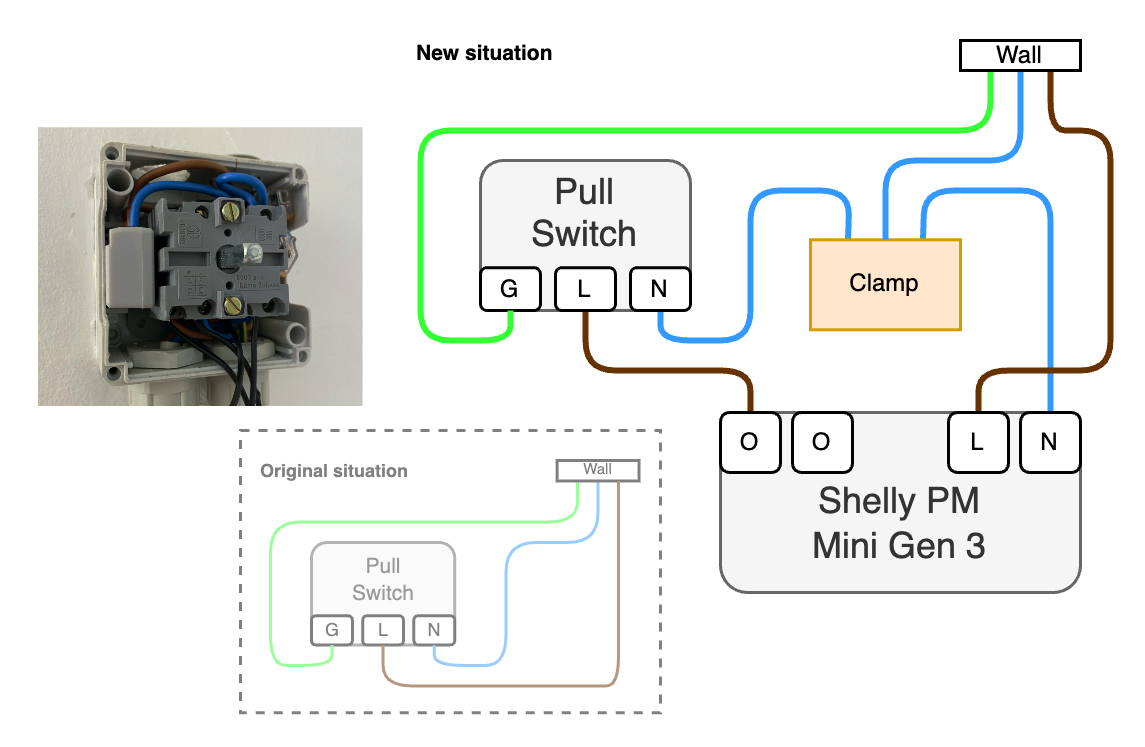
The diagram above shows how I installed the energy meter. For more in-depth information make sure to follow the official guide.
- Disconnect both the null (blue) and phase (brown) wires from the switch
- Connect the phase (brown) wire from the wall to the L input on the Shelly
- Connect a new phase (brown) wire from the O (output) of the Shelly to the L input on the switch
- Connect the null (blue) wire from the wall to the clamp
- Connect a new null (blue) wire from the clamp to the N input on the Shelly
- Connect a new null (blue) wire from the clamp to the N input on the switch
After triple checking everything was installed correctly I turned the power back on.
Configuring the Shelly
Now that the power is back on we should see a new WiFi network that we can join to configure the Shelly device. Open your browser and navigate to http://192.168.33.1 (default IP for Shelly devices).
The most important things you need to configure are:
- Configure your home WiFi on the Shelly device
- After confirming the Shelly is connected to your home network, turn off the built in access point mode (or at least make sure it is password protected)
- Turn off bluetooth mode if you do not plan to use it
- Install any firmware updates
- Give the device a name, e.g. "Washing Machine"
- Tip: Turn on eco mode (this should result in lower power usage for the Shelly device and I have not found any downsides so far)
While still on the Shelly configuration page you can see the power usage of the connected device. Just turn on the washing machine to confirm that everything is working.
The final step is to add the Shelly device to Home Assistant. Go to the integrations page and Home Assistant probably already detected the new device. If the device was not detected you can add the Shelly integration manually.
Configure Home Assistant to send a notification
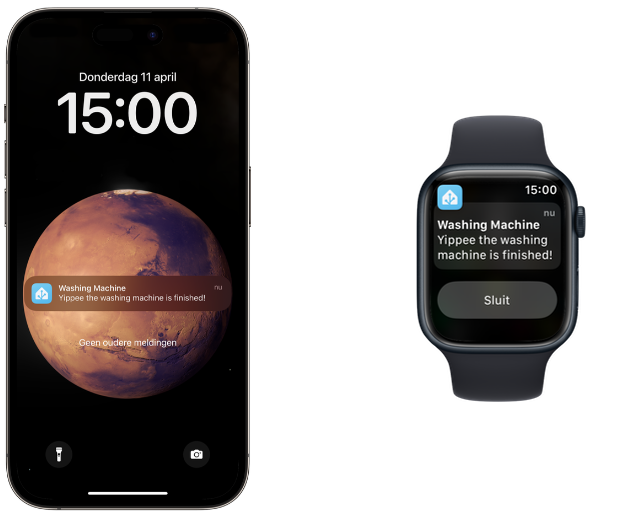
The main goal is to receive a notification on my iPhone when the appliance has completed it's cycle.
After some digging around I found a blue print on the Home Assistant forums called Appliance Notifications & Actions.
After adding this blue print to Home Assistant you need to configure it:
- Select the Shelly power sensor from the dropdown list
- Select the (mobile) device on which the notification should be delivered (make sure to login on given device using the Home Assistant app for it to show up)
- Configure which notifications you want to receive (when the cycle starts or ends) and what content notifications should contain
That's it! I kept the remaining settings unchanged and for me this all worked out perfectly.
When the washing machine (or dryer) starts I will receive a notification on my iPhone. And the same happens when the cycle is completed. Your results may differ, but I have never received a notification before the cycle completed. If that happens, you can tweak the settings in the automation.
Wrapping up
Home Assistant has a build in energy dashboard. You can add the Shelly to this dashboard by navigating to settings -> dashbpards -> energy. This will result in nice diagrams of the energy consumed by the washing machine and dryer.
And that's it, from now on you will receive a notification on your phone when the washing machine is ready. Damp wet clothes are now part of history ;)